
The Simple Web Service is one of the best simple patterns that you will often see in a serverless architecture. Coined by Jeremy Daly – https://www.jeremydaly.com/serverless-microservice-patterns-for-aws/#simplewebservice this stack is a great one to build for a fundamental web application.
The simple web service is made up of three main elements.
- DynamoDB – our database, for holding dynamic data
- Lambda – the compute
- Api Gateway – the network gateway

To create the DynamoDB we do not need many elements. The table is set to pay per request and destroy mode as an example. The partition key will be ‘ID’ and the table name is simpleWebServiceTable.
    // Dynamo Table for returning data
    const dynamoTable = new dynamodb.Table(this, 'simpleWebserviceTable', {
      billingMode: dynamodb.BillingMode.PAY_PER_REQUEST,
      partitionKey: { name: 'ID', type: dynamodb.AttributeType.STRING },
      removalPolicy: RemovalPolicy.DESTROY,
      tableName: 'simpleWebServiceTable',
    });
Next, we have the Lambda function, for this we can use the node js function. We will pass an environment variable into the function for the table name, using dynamoTable.tableName. We will also grant the lambda function read access on the dynamo db table.
    // Node Lambda Function
    const lambdaFn = new lambdaNode.NodejsFunction(this, 'LambdaFunctionHandler', {
      runtime: lambda.Runtime.NODEJS_14_X,
      entry: 'lambda/simpleWebservice.ts',
      handler: 'main',
      timeout: Duration.seconds(3),
      bundling: {
        externalModules: [
        ],
        nodeModules: [
        ],
        minify: true
      },
      environment: {
        region: process.env.CDK_DEFAULT_REGION!,
        tableName: dynamoTable.tableName
      }
    });
    // Grant read access to the lambda function on the dynamo table
    dynamoTable.grantReadData(lambdaFn);
The final part of the infrastructure is the AWS API Gateway, for this we are going to use a Rest API. First, we add a versioning resource to the api, this gives us our /v1, next we will add the api itself, the example is get-dynamo-item, this give us the api endpoint /v1/get-dynamo-item. Next add some CORS options to allow all origins, this will open the API up to anyone. Finally, we add the lambda integration. This hooks up the lambda and the api gateways, setting the lambda integration as a GET method.
    const gateway = new apigw.RestApi(this, 'ApiGAteway');
    const version = gateway.root.addResource('v1');
    const api = version.addResource('get-dynamo-item');
    // enable cors
    api.addCorsPreflight({
      allowOrigins: apigw.Cors.ALL_ORIGINS
    });
    // Integration of lambda
    const lambdaIntegration = new apigw.LambdaIntegration(lambdaFn);
    // Add the Lambda as a GET method
    api.addMethod('GET', lambdaIntegration)
Before we deploy the stack, the lambda directory and code must be created. The directory will be ‘lambda’ under the project directory and the code typescript file will be ‘simpleWebservice.ts’. The code for this example is quite simple and has a hard coded lookup on the dynamo table.
The Lambda code will just go and grab an item from dynamo with the ID TEST_ITEM and return it to the user with a 200 response.
import { Context, Callback } from 'aws-lambda';
import {DynamoDB} from 'aws-sdk';

export async function main(event: any, _context: Context, callback: Callback) {

    try {
        // Write a random number to the dynamo table
        const documentClient = new DynamoDB.DocumentClient();
        const params: DynamoDB.DocumentClient.GetItemInput = {
            TableName : process.env.tableName!,
            Key: {
                ID: "TEST_ITEM"
            }
        }
        const data = await documentClient.get(params).promise();
        console.log('data ', data);
        return {
            statusCode: 200,
            headers: { "Content-Type": "application/json" },
            body: JSON.stringify(data)
        };
    } catch (error) {
        console.log('error', error)
        return {
            statusCode: 400,
            headers: { "Content-Type": "application/json" },
            body: JSON.stringify(error)
        };
    }
}
The stack can now be built and deployed.
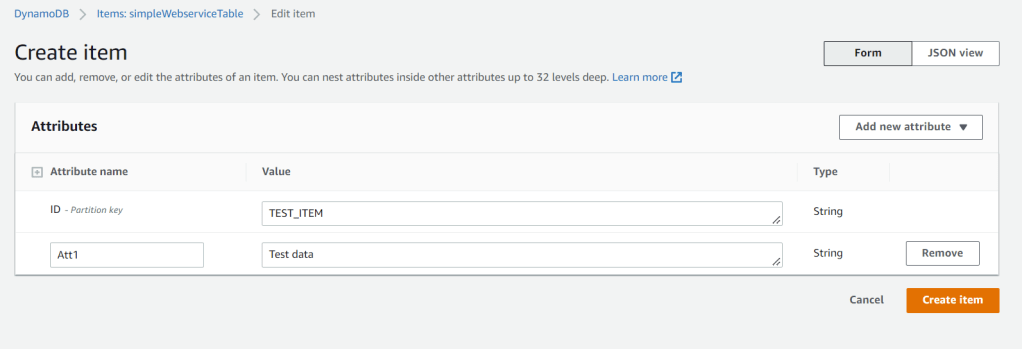
Once the stack is deployed, we need to add the example data to the dynamo table for testing. The ID for this needs to be the same as the hard coded get in the lambda function, in this case TEST_ITEM.
To add an item, navigate to the dynamo service, select the table created (called simpleWebserviceTable) and click add item.
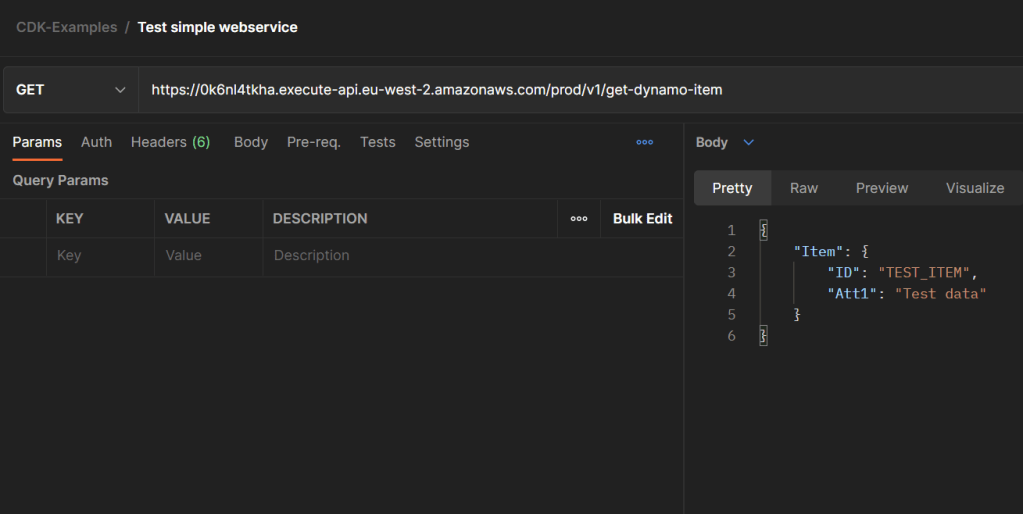
You can now hit the API. The base URL can be found as a result of the build process. Added to the end of this url we need to add the resource and the method (/v1/get-dynamo-item).

Using a tool such a postman we can now hit the full url as a GET request and we can see that the item is returned.
Checkout the code on GitHub
Categories: AWS

Leave a comment